Have you ever submitted a business card, flyer, brochure, or postcard design to a printer only to hear:
“Your file needs bleed before we can print it.”
If so, you’re not alone.
At Printfever, one of the most common file issues we encounter is missing bleed. Many customers create beautiful designs but aren’t familiar with the technical requirements needed for professional printing.
The good news is that bleed is actually very simple to understand.
In this guide, we’ll explain what bleed is, why it’s important, how to add it to your files, and what to do if you’ve created your design using Canva, ChatGPT, or another AI-powered design tool.

Quick Answer: What Is Bleed?
Bleed is an extra 0.125″ (1/8 inch) of artwork that extends beyond the final size of a printed piece.
This extra area is trimmed away after printing and helps ensure that colors, photos, and background graphics reach all the way to the edge of the finished product without leaving unwanted white borders.
If your design contains a background color, image, pattern, or graphic that touches the edge of the page, it almost certainly needs bleed.
Why Is Bleed Necessary?
Professional printing equipment is extremely accurate, but no cutting process is perfect.
Printed pieces are typically produced on large sheets and then trimmed down to their final size. During this process, there can be very small cutting variations.
Without bleed, these slight variations can expose tiny white edges around your design.
While the difference may only be a fraction of a millimeter, it can be very noticeable on a finished business card, flyer, brochure, or postcard.
Bleed provides a margin of safety that allows printers to trim your project cleanly and consistently.
A Simple Example
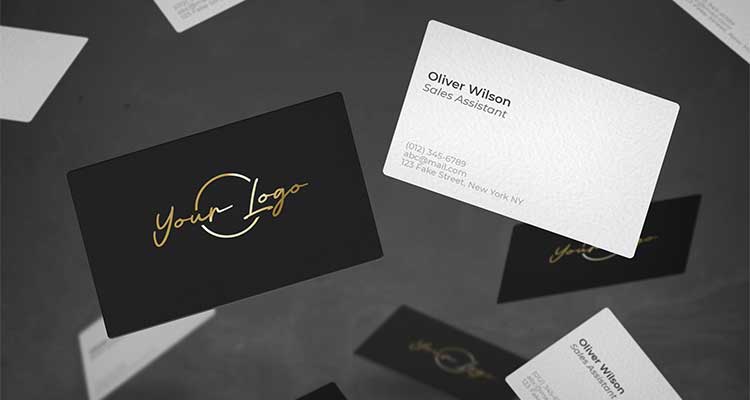
Imagine you’re printing a business card with a dark blue background.
The background color extends all the way to the edge of the card.
If the artwork stops exactly at the finished size and the cutter shifts slightly during trimming, a thin white line may appear along one edge.
The card may still be usable, but it won’t look professional.
By extending the blue background into the bleed area, the printer has extra artwork to trim away, ensuring the color reaches the edge of the finished card.
What Happens If My File Doesn’t Have Bleed?
Missing bleed can cause several problems:
- Unwanted white borders around the edges
- Uneven trimming appearance
- Production delays while the artwork is corrected
- Additional design work before printing can begin
- In some cases, the need to recreate portions of the file
This is especially common with business cards, postcards, flyers, and brochures that have full-color backgrounds.

How Much Bleed Do I Need?
For most commercial printing projects, the standard requirement is:
0.125″ (1/8 inch) on all four sides
Standard Business Card Example
Finished Size:
3.5″ × 2″
File Size With Bleed:
3.75″ × 2.25″
Standard Flyer Example
Finished Size:
8.5″ × 11″
File Size With Bleed:
8.75″ × 11.25″
The bleed area is removed during the trimming process and will not be visible on the final printed piece.
Understanding Bleed, Trim Line, and Safe Area
These terms are often confused, but each serves a different purpose.
Bleed Area
The extra artwork outside the final size of the piece.
This area will be cut off after printing.
Trim Line
The final size of the printed product after it has been trimmed.
Safe Area
The area inside the trim line where important content should remain.
Items such as:
- Logos
- Phone numbers
- Email addresses
- QR codes
- Website URLs
- Important text
should be kept safely away from the edge.
As a general rule, keep important elements at least 0.125″ inside the trim line.

Designing Business Cards with ChatGPT or AI? Don’t Forget Bleed
Recently, we’ve noticed a growing trend.
Many customers are using ChatGPT, AI image generators, and online design platforms to create business card designs and marketing materials.
These tools can produce impressive artwork, but there is one common problem:
Most AI-generated designs are not automatically prepared for professional printing.
For example, ChatGPT may create a business card image that measures exactly 3.5″ × 2″.
The design looks perfect on screen, but because there is no bleed area, the file may not be suitable for printing.
This is one of the most common issues we currently see with AI-generated business card artwork.
How to Fix an AI-Generated Design
If you created your design using ChatGPT or another AI tool, here are a few options:
Option 1: Rebuild the Design in Canva
Create a new document that includes bleed and place the AI-generated artwork into the layout.
Then extend the background elements into the bleed area.
Option 2: Recreate the File in Illustrator or InDesign
This is usually the best option when professional print quality is important.
These programs allow bleed, crop marks, and other print-production settings to be configured correctly.
Option 3: Ask Your Printer for Assistance
Depending on the design, your printer may be able to add bleed or make minor adjustments.
However, this isn’t always possible and sometimes requires redesigning portions of the artwork.
Before sending any AI-generated design to print, make sure:
- The file includes bleed
- Images are high resolution
- Important text remains inside the safe area
- The file is exported correctly
- The printer’s specifications have been followed
How to Add Bleed in Canva
Canva is one of the most popular design platforms among small businesses.
To export a file with bleed:
- Create your design.
- Click Share.
- Select Download.
- Choose PDF Print.
- Enable Crop Marks and Bleed.
- Download the file.
Always verify that background images and colors extend fully to the bleed area before exporting.
How to Add Bleed in Adobe Illustrator
- Select File > New.
- Enter the final trim size.
- Set the bleed to 0.125″ on all sides.
- Extend backgrounds and images to the bleed guides.
- Export a print-ready PDF.

Common Bleed Mistakes
The Background Stops at the Edge
Many files are designed at the final size but don’t include extra artwork beyond the trim line.
Text Is Too Close to the Edge
Even with bleed, text placed too close to the trim line can appear uneven after trimming.
Exporting Without Bleed
The bleed may exist in the design file but not in the exported PDF.
Always check your export settings.
Using a Screenshot Instead of the Original File
Screenshots are often low resolution and rarely include proper bleed settings.
Frequently Asked Questions
Is bleed really necessary?
If your design contains colors, photos, or graphics that extend to the edge, yes.
Bleed is essential for achieving professional printing results.
Does bleed change the size of my business card?
No.
The bleed area is trimmed away during production. Your finished card will still be 3.5″ × 2″.
Can a printer add bleed for me?
Sometimes.
It depends on the artwork. Simple designs may be easy to adjust, while more complex layouts may require redesign work.
What if my design has white borders?
If the white border is intentional and part of the design, bleed may not be necessary. Your printer can review the file and advise you.
Final Thoughts
Bleed may seem like a small detail, but it plays a major role in producing professional-looking printed materials.
Whether you’re printing business cards, brochures, flyers, postcards, catalogs, or presentation folders, properly setting up bleed helps prevent white borders, trimming issues, and production delays.
The easiest way to remember it is this:
If your design goes to the edge, it needs bleed.
If you’re not sure whether your file includes bleed, the team at Printfever is always happy to review your artwork before it goes to print.